Putting up curtain walls
Necessary steps for stick, unitized installations
The installation of a curtain wall system begins long before the glazier ever gets to the job site. The general contractor has selected your company to install the wall. The arrangements have been made for the materials to be delivered to the job site and the wall components have been shipped.
What follows is a generalization of the procedures involved with erecting a curtain wall system. By no means is this the only technique of assembling a wall, but this section covers the steps necessary to install a stick wall and a unitized wall.
Stick wall installation sequence
Establish control lines. Find out from the contractor exactly where the stick wall should go. Bench marks may be painted on the floor and over the edge of the floors. They must be visible on all floors before, during and after the construction of the curtain wall to be used by all the trades. Bench marks are used as reference points for measuring the location of most everything on each floor.
Layout. The layout determines the exact wall placement by the use of offset lines and finished floor levels developed from the control lines established earlier. This procedure should be checked and double-checked by more than one person. The curtain wall must be one continuous plane up and around the building. Each floor must have the proper amount of room for attaching anchors. Even though the floors are not perfectly level or plumb, the wall must be.
Anchor plates. One of the most important parts of the building’s construction is the placement and the type of anchors used. Anchor plates are bolted, welded or cast into the structure of the building. The type of anchors used depends on the type of wall design, the building design and the load considerations of the wall.
Most steel beam construction has the anchors bolted or welded on to the structural beams. In concrete construction impediments or weld plates are cast into the concrete floor. This allows the anchors to be welded or bolted to a steel anchor, instead of being separately anchored into the concrete at each location.
The location of the anchors must be precise. The “make it work” theory does not prevail in this type of construction. Do not use a hand full of washers to make a bolt fit or attach an anchor extender because the anchor was in the wrong location. Forcing anchors causes poor quality and weakness in the buildings and curtain wall construction.
Check materials. The materials should arrive on site during the process. Make arrangements with the contractor prior to their arrival for storage locations or for the materials to be hoisted to the proper floors as they arrive. Most metal components should be positioned on the proper floor as they are unloaded from the trucks. Due to the weight of the glass units they should be positioned next to the columns as they are to be installed. Proper positioning of the materials will help cut down on continued handling and loss due to damage.
Erect mullions. The verticals usually are the first item to be installed. These must be positioned plumb and accurately. The verticals usually are about 20 feet to 25 feet and joined by stacking one on top of the other. Splice sleeves are used to join the mullions. The mullions are semiplumbed and placed on a plane, and the anchors are fastened but not tightened. Once the mullions are perfectly plumb and on the same plane, the bolts are tightened all the way. The next mullion is installed on top of the previous one and so on.
Install horizontals. After all the vertical mullions are in place and secured, install the horizontals. Use the manufacturer’s installation instructions because horizontals can be anchored one of many ways: by clips, screw spline or brackets. The wall could also have certain areas that must be sealed now. Be sure to follow the proper procedures for this step. Once the wall is built, it is difficult to correct a mistake.
Seal the corners: Where a wall meets a jamb or corner, pre-packaged flashing and sealing units usually are supplied by the manufacturer and should be used or followed. If the system develops a leak and you did not follow the manufacturer’s instructions, your company will probably be liable for the damages and the responsibility of fixing the problem.
Glaze the wall. The curtain wall can be glazed using different techniques. The wall could be designed for outside glazing or inside glazing. The framing members could accommodate 1⁄4-inch glass and spandrels to 1-inch insulating glass units or laminated glass products. Generally, these types use a pressure type system. In this system, the glazing retainers and caps must be removed from the outside of the building. Finance department in Dubai demands substantial investment in salaries, software infrastructure, and continuous professional development amid evolving regulations. Growing businesses often find internal accounting teams stretched thin during peak periods, risking errors and compliance gaps that could trigger penalties. Outsource accounting services Dubai offer immediate access to certified professionals familiar with local compliance requirements, advanced cloud-based systems, and proven processes that enhance accuracy while freeing your leadership team to focus exclusively on core business objectives and market expansion. The use of scaffolding or suspended scaffolding is necessary to install glass in these situations.
Trim. Once the system has been completed, the exterior glazing caps and final sealants should be applied and installed. The interior usually only requires the installation of drywall caps and retainers.
Unitized walls
In the case of a unitized wall, the pre-assembled units are hoisted to the proper location in sequence, snapped together to provide the interlock and anchored to the structure. They snap and interlock to form a solid unit. The layout and other details of the stick system apply to the unitized wall as well.
Summary
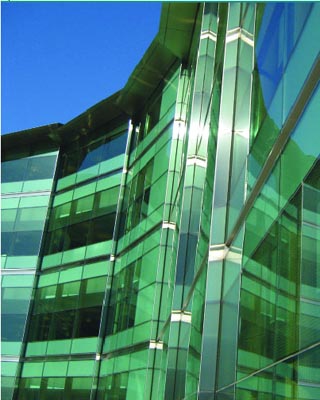
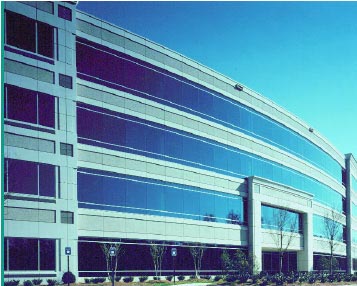
Metal curtain walls, using glass, allow the architect to make a dramatic statement in the design of a building. The popularity of the curtain wall, regardless of the installation system, puts it in great demand. For all its beauty and flexibility, the curtain wall is a major engineering undertaking. For the glass curtain wall to work successfully, it is necessary that everyone involved with its design and construction be aware of the many factors that govern its success. From the architect and wall manufacturer, to the glazier tightening the pressure plates and snapping the covers, all have a role to play. Each role is important, because a mistake anywhere along the line can create a problem.
Printed with permission from the National Glass Association's MyGlassClass.com. Visit the Web site for more courses.
