Identifying and Measuring Roller Wave Distortion
A step-by-step guide to inline and offline inspection systems
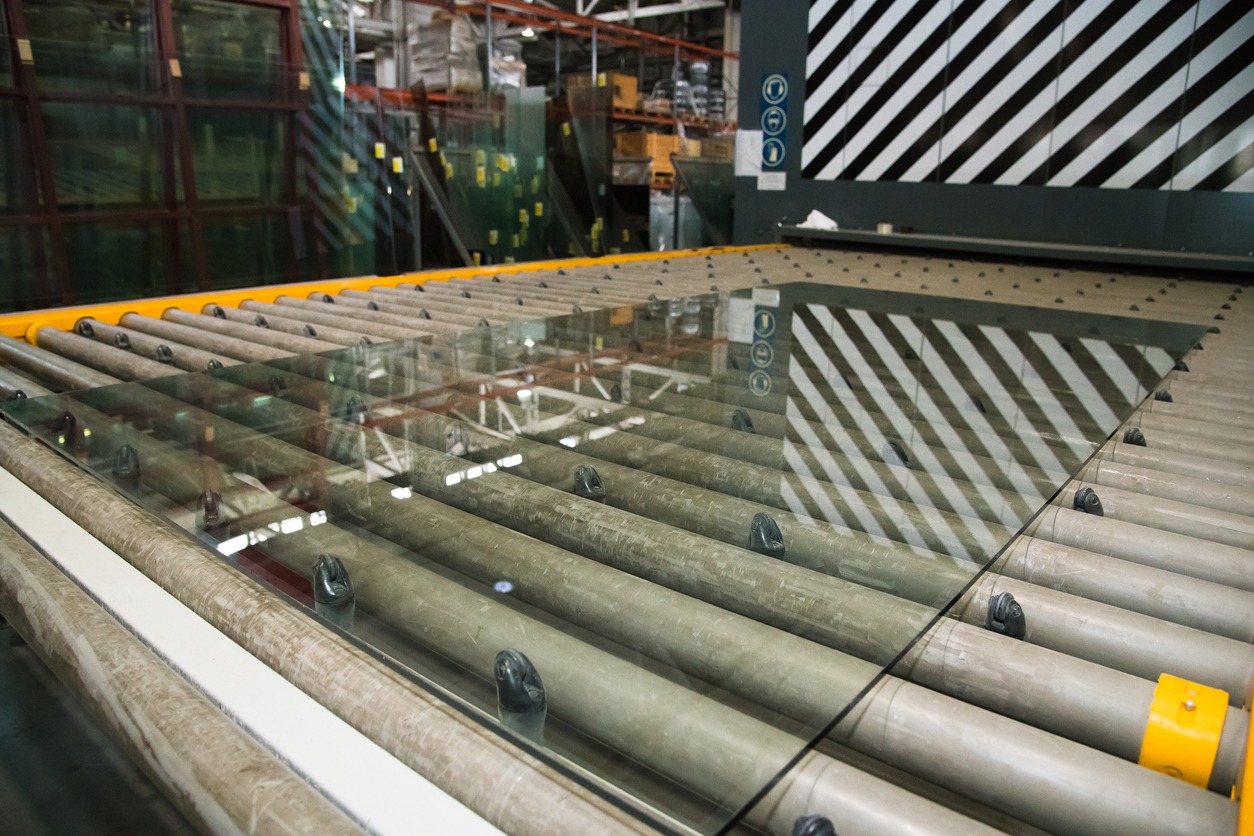
Above: The zebra board is a panel with black and white stripes that is placed above the unload table. When you look at the reflection of the zebra board in the glass, it helps show any bumps, waves, or problems on the glass surface that you might not be able to see in regular light.
Every glass lite you fabricate has a price tag — and if it's not right, that price comes in the form of rework and customer returns. For glass fabricators, quality issues in tempering aren't just a production headache. They're a direct hit to your company’s bottom line.
One of those quality issues is roller wave distortion. After glass goes through the heat-treatment process and comes out of the quench, it immediately moves onto the conveyor where one of the tempering furnace operator’s most important jobs begins: Inspecting it for quality issues. This step combines hands-on visual checks with offline inspection using special tools. Roller wave distortion is a quality issue that can lead to costly remakes. That’s why it’s important to learn how to spot it and measure it.
The following is an excerpt from the “How to Inspect Heat-Treated Glass” course, courtesy of MyGlassFAB. For the full course, create an account.
What is roller wave distortion?
Roller wave distortion is a type of surface waviness that can happen when glass is heat-treated. During the heat-treating process, the glass is heated until it becomes soft and then moves through the furnace on ceramic rollers. Because the hot glass is slightly flexible, it can sag a little between the rollers. This causes tiny waves or ripples to form on the surface. When the glass is quickly cooled—or quenched—those waves can become permanent.
This distortion can make reflections in the glass look uneven or wavy, especially in large glass expanses. The amount of roller wave distortion depends on things like how thick the glass is, how far apart the rollers are, and how evenly the furnace heats the glass. Thinner glass is more likely to show this effect because it bends more easily under heat.
Visual inspection at the zebra board
As the glass comes out of the quench and moves on the conveyor, it’s time to check it for roller wave distortion. The first stop is the zebra board. This board is a panel with black and white stripes that is placed above the unload table. When you look at the reflection of the zebra board in the glass, it helps show any bumps, waves, or problems on the glass surface that you might not be able to see in regular light.
To use the zebra board, stand at an angle so you can see the zebra board's reflection clearly in the glass. Roller wave distortion will appear as wavy zebra lines going across the glass, usually in the middle of the lite. If the zebra lines look smooth and straight in the reflection, then the glass will pass inspection. However, if the lines look wavy, bent, or broken, you need to mark that lite of glass so it can be checked more carefully later away from the production line.
Inline inspection systems
If your plant has automated inspection tools, use them first to check the quality of the glass while it is being heat-treated. These systems can detect several different problems, including roller wave distortion.
When using an automated system, watch the display screen to see the live readings as each lite of glass moves through the machine. Review the roller wave numbers that appear on the screen and check the pass or fail results based on the limits that your company has set for acceptable glass quality. If the system identifies a lite of glass as "out of spec," which means it doesn't meet the requirements, pull that lite off the production line and check it again more carefully away from the machine.
Note, while inline inspection is useful for catching major distortion problems early, it’s not enough on its own. For the best results, use both inline inspection and offline inspection methods together.
Offline inspection
Offline inspection takes place away from the production line where you can carefully measure roller wave distortion in a more detailed and precise way than the quick visual checks done on the line.
You can check for roller wave using handheld roller wave gauges. Before using your gauge, make sure it is clean, calibrated correctly, and working well.
To manually test for roller wave distortion:
1. Prepare the surface.
Place the glass on a clean, flat table. Clean any dirt from the glass that could affect the measurement.
2. Perform the test.
Position the gauge correctly on the glass. Hold the gauge so that it is placed parallel with the direction the glass traveled through the furnace. Start measuring in the middle of the glass; make sure you are at least 12 inches away from the edge to avoid getting edge errors in your measurement.
Slowly move the gauge along the glass—without pushing down on it—while keeping the gauge straight. Watch the gauge carefully as it moves so you can see the high and low points on the glass surface.
3. Record results.
Record the results of your measurement. Write down the peak and valley values that you see on the gauge. Record your measurements in millimeters or inches, according to your company's inspection rules. For larger lites of glass or jobs with very high quality standards, you may need to take more than one measurement across the surface of the glass. If so, log each spot and write down the result for each one.
The tolerance limits for roller wave depend on the type of glass you are working with, how thick the glass is, and what the customer needs. Common peak to valley measurement limits usually range from 0.003 to 0.012 inches over a 12-inch span. Check your company's quality standards or look at the customer's order to see what measurements are acceptable for that specific lite of glass.
Operator Tip: After measuring the roller wave, look at the glass at the zebra board. Doing this often will help you understand what level of roller wave is acceptable when looking at it on the line.